how to add money to apple pay?

It’s crucial for a frequent Apple Pay user to know how to top it up with money, to always have smart cash on hand. It’s like putting cash in your wallet, but way cooler. It’s for anyone who wants to tap, pay, and be on their way.
Introduction to Apple Pay
In today’s fast-paced world, Apple Pay offers a convenient and secure method to handle your transactions with just a tap on your device. Paying for a coffee doesn’t need juggling with cash anymore. Either it’s online shopping, or splitting the bill, be always ready to pay with Apple Pay.
Just in case, you’re short on time, before digging in-depth, here’s a quick overview on how to add money to Apple pay.
| Method | Steps |
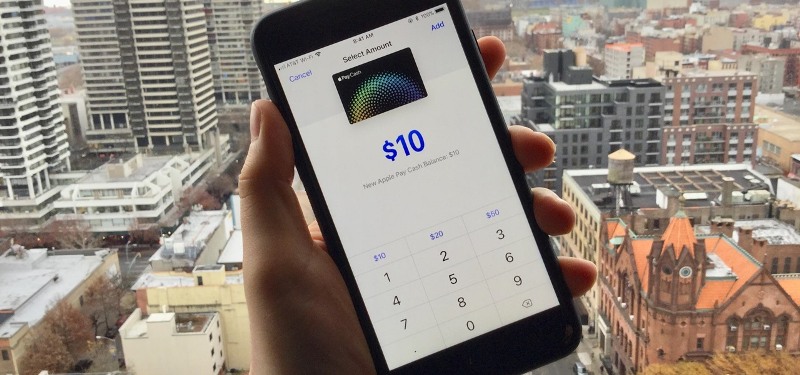
| Adding money to Apple pay | 1. Open Wallet app on iPhone. 2. Tap Apple Cash card > More button > Add Money. 3. Enter the amount and confirm with Face ID, Touch ID, or passcode. |
| Adding to Apple Account Balance | 1. On iPhone/iPad, open the App Store and tap profile. Or, on Mac/PC, open the App Store/iTunes and sign in. 2. Tap “Add Money to Account” or go to Account Information page > Add Money. 3. Choose the amount, set up Auto Reload if desired, and follow onscreen instructions to complete. |
| Using a Credit or Debit Card | 1. Open Wallet app and select Apple Cash card. 2. Tap More button > Add Money. 3. Enter the amount and authenticate the payment. |
| Transfer From Another Bank Account | 1. Open Wallet app and select Apple Cash card. 2. Tap More button > Transfer Money. 3. Choose bank account, enter amount, and tap Transfer. |
| Receiving a Payment | Ask someone to send you money via Apple Pay. The received amount automatically adds to your Apple Cash account. |
Setting Up Your Device for Apple Pay
Before adding money, let’s get your device ready for Apple Pay.
Checking Device Compatibility
| Device Type | Compatibility with Apple Pay |
| iPhones & Apple Watches | Fully compatible, ideal for all Apple Pay transactions |
| iPads | Compatible for apps and website purchases only |
| Macs with Touch ID | Fully compatible, seamless with Apple Pay |
Updating to the Latest Software
Keeping your device’s software up to date ensures Apple Pay works smoothly and securely. Simply go to your device settings, check for software updates, and install any available to keep your Apple Pay experience optimal.
iOS Update Steps
- Open Settings: Find that gear icon on your home screen.
- Tap General: It’s like the control room for your iPhone.
- Hit Software Update: If there’s an update, you’ll see it here. Tap to install and give it a few minutes.
MacOS Update Steps
- Apple Menu: Click the apple in the top corner of your screen.
- System Preferences: This is where the magic happens.
- Software Update: If your Mac needs an update, you’ll find it here. Click, relax, and let your Mac do its thing.
Activating Apple Pay
Getting Apple Pay ready is easy. Let’s set it up on your iPhone and iPad.
On Your iPhone
- Open Wallet App: Tap the Wallet app on your home screen.
- Add a Card: Hit the plus sign in the upper right corner.
- Follow Instructions: Scan your card with the camera or enter details manually.
On Your iPad
- Go to Settings: Find the Settings app and tap it.
- Wallet & Apple Pay: Scroll down and select this option.
- Add Card: Choose “Add Credit or Debit Card” and enter your card info.
On Mac or PC
Digital nomads always carry their lappy with ‘em so if you’re one, let me tell you how to set up Apple Pay on a computer. Here’s how to get started, using Safari and your Apple ID.
Using Safari for Apple Pay Setup
On a Mac:
- Open Safari: Start by opening your Safari browser.
- Preferences: In the menu bar, click on “Safari,” then “Preferences.”
- Privacy Tab: Click on the “Privacy” tab, and check “Allow websites to check if Apple Pay is set up.”
This lets you use Apple Pay on websites that support it, right from your Mac.
On PC:
PCs don’t directly support setting up or using Apple Pay in a web browser like Safari, you can manage your Apple ID payment methods online, which sync across your devices. This way, when you use Apple Pay on an authorized device, all your payment information is readily available.
Sync Your Devices: Ensure that your Apple devices (iPhone, iPad, or Apple Watch) are synced with your iCloud account. This allows for a seamless experience when using Apple Pay on websites via Safari on your Mac.
Use Safari on an Apple Device: To make purchases with Apple Pay on the web, use Safari on your Mac, iPhone, iPad, or Apple Watch. When you’re on a website that supports Apple Pay, look for the Apple Pay option at checkout.
Verify with iPhone or Apple Watch: If you’re shopping on a Mac and want to use Apple Pay, you might need to verify your purchase with your iPhone or Apple Watch, depending on your settings.
This way, when you use Apple Pay on an authorized device, all your payment information is readily available.
Linking to Your Apple ID
- System Preferences: First, click on the Apple menu, then “System Preferences.”
- Apple ID: Click on your Apple ID, then choose “Wallet & Apple Pay.”
- Add Card: Hit the “+” to add a new card to Apple Pay.
Funding Your Apple Pay
Filling up your Apple Pay is like loading up your wallet before you head out. But instead of cash, you’re using modern tech.
Let’s get to know how to add that money power.
How to add money to your Apple pay using a Debit or Credit Card
Using a debit or credit card is the most convenient way to add funds to Apple Pay. Just open the Wallet app, tap to add a new card, and follow the steps to securely link your card for instant transactions.
Steps to Add a Card
- Open Wallet: Tap the Wallet app and hit the plus sign.
- Scan Your Card: Use your camera or type in card details manually.
- Confirm: Follow the steps to add your card securely.
Verifying Card Information
- Confirmation Call/Text: Your bank might send a code via call or SMS.
- Enter Code: Punch in the code to activate your card for Apple Pay.
Directly From Your Bank Account
If you prefer using your bank account. Here’s how.
Setting Up Bank Account Details
- Go to Settings: In the Wallet app, tap your Apple Cash card, then tap the more button.
- Bank Account: Choose “Add Money” and select “Add Bank Account.”
- Enter Details: Put in your account info and follow instructions.
Transferring Funds to Apple Wallet
- Select Amount: Decide how much to transfer from your bank.
- Confirm Transfer: Review details and confirm to move money to Apple Pay.
Whether using a card or bank account, these steps make sure your Apple Pay is ready for anything—shopping, sending money, or buying online.
Leveraging Apple Pay for Transactions
Apple Pay isn’t just about paying in stores. It’s also about making your financial life easier right from your devices.
Adding Money to Apple Pay
To send money via Messages, simply start a chat, tap the Apple Pay button, enter the amount, and hit “Pay.” Confirm the payment by reviewing the details and authenticating with Face ID, Touch ID, or your passcode.
Using Apple Watch
- Open Wallet: On your Apple Watch, find the Apple Cash card.
- Press “Add Money“: Choose how much to add.
- Double Click: Use the side button to confirm.
Sending Money with Apple Pay in Messages
Quickly send money to friends or family using Messages.
Initiating a Payment in a Conversation
- Open Messages: Start a chat with the person you want to pay.
- Tap the Apple Pay button: Enter the amount and tap “Pay.”
Confirming the Transaction with Apple Pay
- Review: Check the amount and contact info.
- Authenticate: Confirm with Face ID, Touch ID, or your passcode.
Managing Your Apple Pay Account
Manage your Apple Pay like a pro. Keep your payment methods organized and handle recurring payments effortlessly.
Handling Multiple Payment Methods for Apple Pay
- Add Multiple Cards: Easily add several cards to Apple Pay for more flexibility. Open Wallet, tap “Add,” and follow the steps for each card.
- Select a Default Card: Set your go-to card in Apple Pay by tapping on your preferred card in the Wallet app and selecting “Make Default.”
Scheduling Recurring Payments
Manage your regular expenses directly through Apple Pay for a hassle-free experience.
- Setting Up a Recurring Payment: Choose a card in Wallet, select “Set Up Recurring Payment,” enter payment details, and schedule.
- Editing or Canceling Scheduled Payments: To adjust, go to your scheduled payment list, select a payment, and choose “Edit” or “Cancel” as needed.
Managing Your Apple Pay Account
Apple Pay makes managing money simple. Organize cards and handle payments smoothly, all in one place.
Handling Multiple Payment Methods for Apple Pay
Apple Pay lets you add and manage several cards for payments. Just pick the card you want to use right from your device before making a purchase.
Adding Multiple Cards
- Open Wallet App: Tap the plus sign to start.
- Add Details: Scan or enter card info manually for each card.
Selecting a Default Card
- Choose in Wallet: Tap on any card.
- Set as Default: Select “Make Default” to use it automatically for payments.
Setting Up a Recurring Payment
- Find Your Card in Wallet: Choose the card for the payment.
- Schedule Payment: Enter the amount, date, and frequency.
Editing or Canceling Scheduled Payments
- Go to Scheduled Payments: Pick a payment to change.
- Edit or Cancel: Make your updates or choose “Cancel” to stop the payment.
Advanced Features and Commands
Unlock the full potential of Apple Pay with these advanced features, making transactions even more effortless.
Using Siri for Apple Pay Transactions
Siri can handle your Apple Pay needs with just your voice, from sending money to checking your balance.
Sending Money Through Siri
- Activate Siri: Say “Hey Siri, send money.”
- Specify Amount and Recipient: Tell Siri how much and to whom.
- Confirm: Siri completes the transaction after your approval.
Checking Balance with Siri
- Ask Siri: Say “Hey Siri, what’s my Apple Pay balance?”
- Get Details Instantly: Siri tells you your current balance.
Responding to Requests for Money
Responding to money requests in Apple Pay is straightforward and quick, ensuring you can manage incoming payment requests. When someone asks for money, you’ll get a notification—tap on it, review the details, and you can either approve sending the money or decline the request, all from your device.
Approving a Payment Request
- Notification: Tap the notification of a money request.
- Approve: Review the details, then approve the payment.
Declining a Payment Request
- Notification: Receive and tap the request notification.
- Decline: After reviewing, choose to decline the request if needed.
Costs Associated with Adding Money to Apple Pay
Understanding the costs is key. Apple Pay is mostly free, but there are some fees you might face.
Understanding Potential Fees
Not all methods of adding money to Apple Pay are created equal. Some come with fees, and some don’t.
| Service | Fee |
| Adding Money with Credit Card | Varies (Check with your credit card provider) |
| Adding Money with Debit Card | No Fee |
| Bank Transfers to Apple Pay | No Fee |
| International Transactions | Varies (Dependent on bank policies) |
Fees for Using a Credit Card
- Credit Cards: Adding money with a credit card might have a fee. It’s wise to check with your card provider for any charges.
No Fees for Debit Cards or Bank Transfers
- Debit Cards and Bank Transfers: Good news! These methods are fee-free for adding money to Apple Pay or your Apple Cash.
Service Charges for Apple Pay
Apple Pay itself doesn’t pile on fees for normal use, but keeps an eye out for specific situations.
International Transaction Fees
- Cross-Border Shopping: If you’re shopping from another country, your bank might charge an international transaction fee. This isn’t from Apple but from your bank.
Optimizing Your Apple Pay Experience
Maximizing the efficiency and security of Apple Pay can transform the way you interact with your finances daily. Implementing best practices and swiftly addressing any issues ensures a seamless and secure experience.
Best Practices for Secure Use
Maintaining the security of your Apple Pay account is paramount. It not only protects your financial information but also ensures that all transactions are smooth and hassle-free.
Regularly Updating Card Details
- Stay Current: As cards expire or are replaced, ensure their details in Apple Pay are updated immediately. This avoids transaction declines and potential disruptions in recurring payments.
- Action Steps: Open the Wallet app, select the card needing an update, tap on the information button, and then choose to update or replace the card details as necessary.
Monitoring Transaction History
- Stay Informed: Regularly review your transaction history within the Wallet app to keep track of your spending and to spot any unauthorized transactions early.
- Security Measure: Immediate identification and reporting of unfamiliar transactions to your bank or card issuer can prevent potential fraud, providing an added layer of security to your financial operations.
Common Issues with Apple Pay
Using Apple Pay smoothly means occasionally troubleshooting. Here’s a look into common hiccups and how to fix them:
Apple Pay Not Appearing in Wallet
- Check Device Compatibility: Apple Pay needs certain models of iPhone, iPad, Apple Watch, or Mac. Ensure your device is up to the task.
- Region Support: Apple Pay isn’t available everywhere. Verify that your country or region supports Apple Pay by visiting Apple’s official website.
Card Not Supported
- Bank and Card Compatibility: Not all banks or cards work with Apple Pay. Your first step should be to check with your bank or card issuer about Apple Pay support.
- Alternative Cards: If one card isn’t supported, try another. Often, major credit and debit cards from leading banks will work.
Difficulty Adding a Card
- Accurate Information: Double-check the card details you’re entering. A simple typo can cause issues.
- Bank Authorization: Sometimes, adding a card requires additional verification from your bank. This might involve receiving a code via text or email that you must enter to confirm.
- Contact Support: If all else fails, your bank’s customer support can often provide the necessary assistance to get your card working with Apple Pay.
Transactions Not Processing
- Retry Transaction: Simple glitches can sometimes interrupt a transaction. Attempt the payment again.
- Device Proximity: Ensure your device is close enough to the payment terminal. Apple Pay requires near-field communication (NFC) to work.
- Alternative Payment Methods: If Apple Pay continues to fail at a terminal, consider using the physical card or another payment app as a backup.
- Terminal Compatibility: Not all terminals are equipped for Apple Pay. Look for the contactless payment symbol or ask the merchant if they accept Apple Pay
Final Words
This article covers each and every aspect on how to add money to Apple Pay and helps you get the most out of Apple Pay, making paying for stuff easy, safe, and fun. I’ve covered everything you need to know about adding money to Apple Pay, and platforms like Money6x.com Earning make the process even more productive. It’s time to be at the best of your productivity.
FAQs
Can I use Apple Pay without a credit or debit card?
- Yes, Apple Pay can be used without a credit or debit card by adding money to your Apple Cash card and using it for transactions.
Is there a limit to how much money I can add to Apple Pay at one time?
- Yes, there are limits set by your bank or Apple on how much money you can add to Apple Pay or Apple Cash at one time. Check with your bank or review Apple’s guidelines for specifics.
Can I add money to Apple Pay from any bank account?
- Most major bank accounts can be linked to Apple Pay for adding funds, but compatibility may vary. Check with your bank to ensure it supports transfers to Apple Pay.
How long does it take for added funds to appear in Apple Pay?
- Funds usually appear instantly when added via debit cards but may take 1-3 business days when transferring from a bank account, depending on your bank’s processing times.
Can I use Apple Pay to withdraw cash at an ATM?
- Yes, if your bank supports it and the ATM is compatible with contactless payments, you can use Apple Pay to withdraw cash.
What should I do if my transaction with Apple Pay is declined?
- First, check to ensure you have enough funds in Apple Pay or Apple Cash. If the issue persists, contact your bank or card issuer for assistance.
Can I add international cards to Apple Pay?
- Yes, Apple Pay supports international cards that are part of supported networks (like Visa, MasterCard) but availability may vary by country and bank.
How secure is adding money to Apple Pay?
- Adding money to Apple Pay is highly secure. Apple uses advanced encryption and privacy measures to protect your transactions and financial information.